

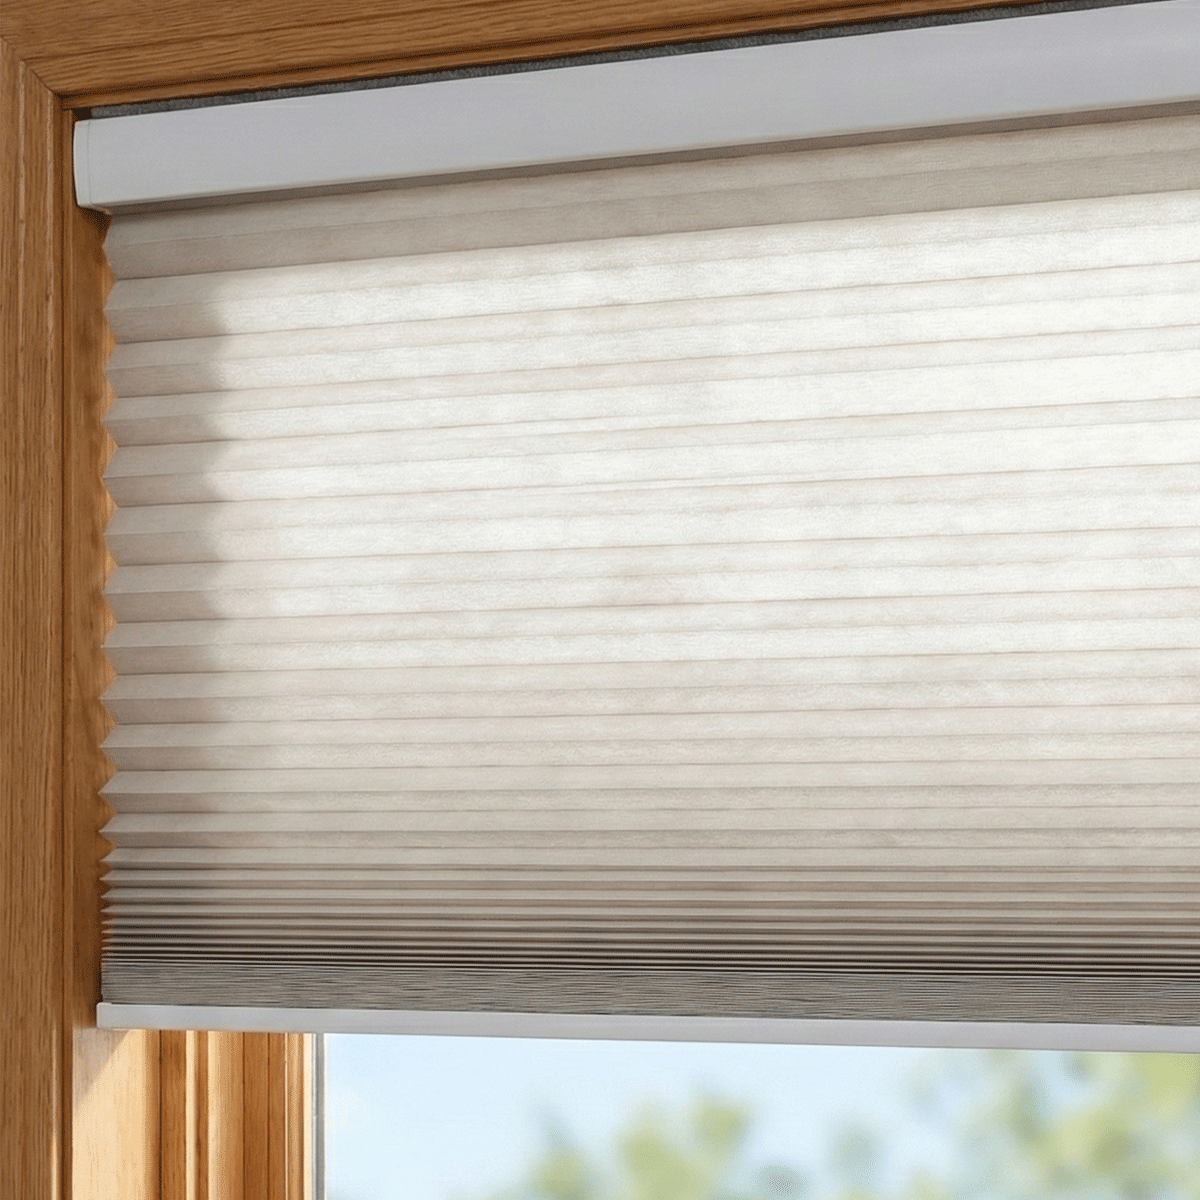


No Drill Cellular Shades: How to Choose and Install
on Oct 21 2026
Introduction: Why No-Drill Window Architecture Matters
Window coverings traditionally demand mechanical fasteners driven directly into surrounding jambs or wall studs. For rental properties, historic structures with preserved millwork, or modern builds featuring delicate composite window frames, penetrating timber or drywall with screws creates permanent alteration and costly repair requirements. No drill cellular shades resolve this challenge by converting lateral compression into vertical load support, delivering full window coverage without puncturing casing surfaces.
Honeycomb shades are structurally ideal for tool-free mounting systems because their expanding and collapsing cell geometry provides an exceptional strength-to-weight profile. When combined with modern compression hardware, these treatments support manual cordless lifts, top-down bottom-up adjustments, and rechargeable motorized smart automation. Achieving a reliable, long-lasting installation requires an understanding of how compression hardware interacts with varied window jamb materials and how mechanical loads shift during daily operation.
Tension and Compression Mechanics: How No-Drill Mounting Works
Drill-free window installations rely on normal force—the perpendicular pressure pushed outward against the parallel surfaces of an inside window jamb. By translating internal mechanical leverage into lateral thrust, the mounting system generates sufficient friction to resist downward gravitational forces and operating pull loads.
Expandable Pressure Headrails vs. Lever Cam Locks
Manufacturers generally employ one of two engineering approaches to generate this lateral holding force: continuous threaded push-rod assemblies or lever-actuated cam locks.
- Threaded Push-Rod Mechanisms: These systems feature an internal drive screw that manually telescopes the headrail assembly wider as a calibration wheel or hex socket turns. As the width expands against both jamb faces, the user progressively dials in tension until the assembly seats firmly. This design allows precise micro-adjustments for frames with subtle measurement variances.
- Lever Cam Locks: Quick-clamping cam designs use an eccentric pivot arm. Positioning the headrail into the window recess and flipping the integrated cam lever drives an internal plate outward, instantly locking the unit into place under pre-calibrated spring tension. While rapid to install, cam mechanisms require careful initial positioning to avoid scuffing paint during engagement.
Frame Surface Compatibility and Friction Integrity
The interface between the mounting bracket and the window jamb depends entirely on high-friction non-marring pads, typically composed of textured silicone or dense thermoplastic elastomers. These pads spread clamping pressure across a broader surface area to prevent indentation while maximizing grip.
Substrate materials react differently to compression loads. Smooth vinyl jambs provide uniform surfaces but have low natural surface friction, making clean, grease-free contact pads essential. Textured painted wood provides strong mechanical bite, though excessive localized pressure can leave impressions in soft oil-based paints. Anodized aluminum casings offer rigid resistance against lateral flex, whereas old plaster or drywall returns require broader contact feet to distribute stress and avoid hairline surface cracking.
Cellular Fabric Profiles: Energy Control and Blackout Dynamics
Cellular shades trap stagnant air within horizontal honeycomb pockets, creating a thermal buffer between interior conditioned air and external glazing surfaces. The mechanical weight of these fabrics directly influences how much outward tension the mounting system must maintain.
Single-Cell vs. Double-Cell Weight Distribution
Single-cell profiles offer lower overall mass, keeping downward gravitational drag low and placing minimal continuous shear strain on the compression pads. Double-cell arrangements double the thermal barrier layers and provide superior acoustic attenuation, but they introduce greater total fabric weight. In wider window spans, this extra fabric mass must be factored into headrail tensioning so the center of the rail does not sag or pull the friction pads out of perpendicular alignment over time.
Mitigating Edge Light Gaps in No-Drill Blackout Setups
For bedrooms and media spaces requiring deep room darkening, selecting dense fabric is only half the equation. When evaluating fabric opacity options, pairing no-drill headrails with products from our blackout cellular shades collection helps block ambient light in bedrooms and media rooms. True darkness, however, depends on managing light bleeds along the perimeter.
Because compression brackets require clearance to seat their friction feet against the jambs, inside-mount no-drill shades naturally exhibit slight vertical clearance gaps along the sides of the fabric stack. To eliminate edge haloing without drilling into the trim, magnetic light-blocking channels or self-adhesive brush strips can be applied directly to the inner casing. These surface-applied side channels trap light leaks along the fabric travel path while preserving the tool-free nature of the overall installation.
Operational Styles: Cordless Top-Down Bottom-Up (TDBU) Mechanics
Top-down bottom-up (TDBU) configurations provide versatile light management by allowing the upper rail to lower for natural daylight while keeping the lower portion drawn for street-level privacy. Operating a TDBU assembly on a tension-mounted headrail requires balanced kinetic tension throughout the shade assembly.
Internal Cord Routing and Floating Rail Alignment
In a cordless TDBU system, two movable rails—the intermediate floating rail and the bottom weighted rail—are suspended by internal equalization cords routed through internal pulleys. These cords counterbalance internal spring motors concealed within the rails. If a floating rail begins to sag or tilt during manual operation, consult our blinds cordless cellular guide to rebalance internal tension cords and restore alignment.
Managing Kinetic Pull Force Without Dislodging the Headrail
Every time a user pulls downward on the bottom rail or tugs downward on the middle rail, kinetic force transfers directly upward through the suspension cords into the compression headrail. If an operator yanks aggressively on the lower rail, that sudden downward force can exceed the static friction of the mounting pads. Smooth, centered adjustments using integrated grab handles ensure downward force distributes evenly, keeping the headrail firmly locked against the jambs.
Smart Automation Integration for Tension-Mounted Honeycomb Shades
Motorizing no-drill cellular treatments elevates daily convenience while eliminating manual operating cord friction. Because traditional hardwired motors require chasing electrical conduit through walls, smart no-drill applications rely entirely on compact, self-contained motorized assemblies.
Internal Rechargeable Lithium Tubes and Weight Considerations
Modern motorized cellular shades integrate ultra-quiet tubular DC motors and slender lithium-ion battery packs directly inside the headrail extrusion. From an architectural perspective, placing the power source within the rail keeps the window profile clean and self-contained. The added mass of battery cells and internal drive gears increases the static load on the tension system, which makes precise lateral tension calibration critical during initial setup.
Soft-Start Acceleration and Lateral Motor Torque
Motor acceleration dynamics are an essential consideration for tension-mounted installations. Abrupt motor startup creates rotational torque that can twist a headrail slightly off its horizontal axis, gradually degrading compression grip. Advanced motorized systems incorporate soft-start and soft-stop acceleration curves. By ramping up rotational speed gradually, the motor eliminates sudden jerk forces, keeping the tension bracket pads seated firmly against the window frame.
Wireless Protocols and Scheduled Scene Automation
Smart motorized cellular shades communicate via low-power wireless protocols, including RF, Zigbee, and Matter-over-Thread. Integrating these wire-free blinds into smart home platforms allows automated scene programming based on the time of day, room occupancy, or solar position. For spaces that need both daylight privacy and total light control, selecting a blackout tdbu cellular product provides dual-rail motorized motion without complex wiring. Automated schedules can lower shades during intense midday heat to reduce thermal solar gain and raise them in the evening without physical effort.
Window Measurement, Depth Clearances, and Installation Protocol
Proper fit is the single most critical factor determining whether a no-drill shade remains securely mounted over years of operation. Because compression brackets rely on exact frame dimensions, precision measuring prevents ordering errors and structural slipping.
Three-Point Inside Mount Width Verification
Window frames settle over time, causing subtle variations in width between the upper header and the sill. To ensure accurate ordering, measure the inside width of the window opening across three distinct locations: the top where the headrail sits, the midpoint of the frame, and the bottom sill. For no-drill tension models, the top measurement is the most critical dimension, though you should verify that mid-frame narrowing will not pinch the fabric as it descends.
Depth clearance must also be confirmed. Tension headrails require a minimum flat jamb depth free of weatherstripping, window cranks, or sash locks so the silicone end-pads can make complete contact with parallel surfaces.
Step-by-Step Tension Calibration and Leveling
Executing a reliable installation follows a structured, logical sequence:
- Clean the Jamb Interface: Wipe the upper left and right contact areas of the window jamb using isopropyl alcohol to remove accumulated dust, oils, or residue that could compromise silicone friction.
- Dry-Fit and Level: Place a small torpedo level across the top of the uncompressed headrail and position the assembly within the window opening at the desired jamb depth. In my experience, taking an extra moment to verify horizontal level before applying tension prevents uneven fabric roll-up down the road.
- Engage the Compression Mechanism: Actuate the cam lever or turn the threaded expansion bolt until the silicone pads make full contact with both jambs. Continue tightening until the tension gauge or recommended rotational resistance is reached.
- Safety and Retention Check: Firmly grasp the headrail near each mounting bracket and apply moderate downward pressure. The assembly should remain immovable without flexing the casing or sliding downward along the paint.
Decision Matrix: Selecting the Ideal No-Drill Cellular Shade Configuration
Selecting the optimal configuration depends on room utility, privacy needs, and automation preferences:
- Standard Cordless Bottom-Up: Best for standard living areas, offices, and guest bedrooms where straightforward upward and downward operation provides sufficient light control with minimal hardware weight.
- Cordless Top-Down Bottom-Up (TDBU): Ideal for ground-floor rooms, street-facing windows, and urban residential settings where natural light from above must be balanced against privacy below.
- Blackout Fabric with Perimeter Seals: Essential for shift workers, nurseries, and dedicated entertainment rooms where complete darkness is needed without drilling holes into casing trim.
- Rechargeable Motorized Systems: Recommended for high windows, large glazed expanses, or smart home environments prioritizing automated energy efficiency and hands-free control.
By pairing proper jamb preparation with the right mechanical tension mechanism and fabric configuration, no drill cellular shades deliver long-term mounting stability, energy efficiency, and modern aesthetic appeal across any window space.
Share